
How to add Base network to my wallet?
How to add Base network to my wallet?
To trade RISITA on Base, you’ll need to add the Base network to your EVM-compatible wallet (it can be MetaMask, Trust Wallet, Coinbase Wallet, Wallet Connect, etc.).
In this article, we’re going to show you how to add Base chain to MetaMask, but the method is quite similar for any type of EVM-compatible wallet.
Do not worry, amigo. It’s easy and fast!
1) Open MetaMask
Click on the MetaMask extension in your browser to open your wallet.
2) Access Network List
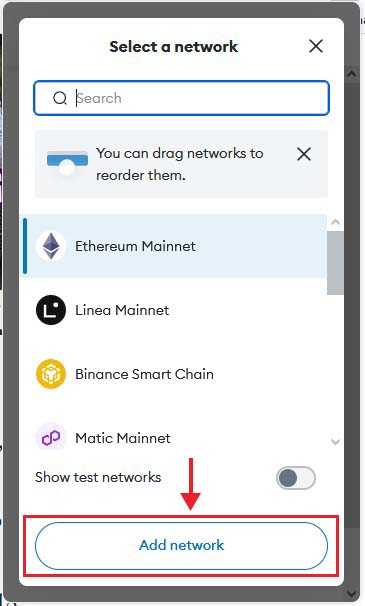
At the top of the MetaMask window, you’ll see the current network selected (most likely Ethereum Mainnet). Click on this network name to open the network list.
3) Add Network
Scroll down the list and click on ‘Add network‘ to start the process of adding a new network.
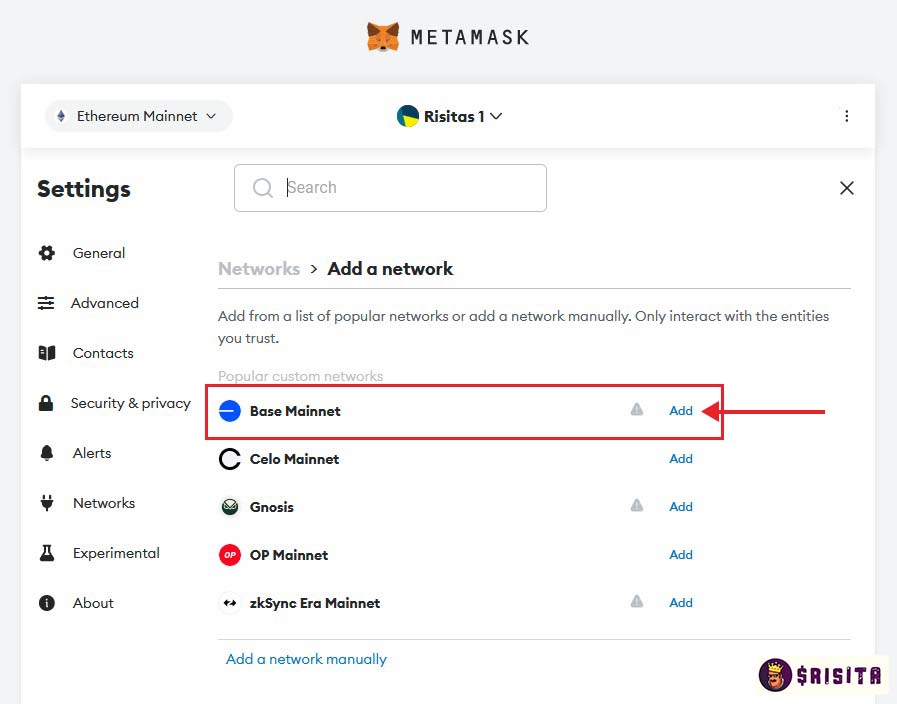
4) Select ‘Base Mainnet’
In the new screen, you will probably see Base network as ‘popular custom network’. Click ‘Add‘ and MetaMask will automatically add the Base network to your wallet with the correct settings.
5) Enter Base’s Network Details
If you don’t see Base Mainnet, you can select ‘Add a network manually‘, and enter the following information for Base Mainnet:
- Network Name: Base Mainnet
- New RPC URL: https://mainnet.base.org/
- Chain ID: 8453
- Currency Symbol: ETH
- Block Explorer URL: https://basescan.org/
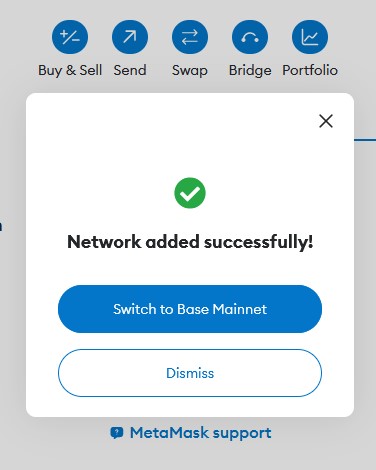
6) Save and Connect
Click the ‘Save‘ button to add the Base network to your MetaMask. Once saved, MetaMask will ask you if you want to switch to the Base network, click ‘Switch to Base Mainnet‘ to start using it.
7) Bridge some Fraction of ETH to Base Chain
A tiny bit of ETH will be needed to trade RISITA, or cover Base’s feather-light transaction fees on Uniswap (using Base chain).
This can easily be done through a Centralized Exchange (CEX), the official Base bridge, or Orbiter Finance. Read our complete tutorial to bridge ETH to Base Mainnet!
